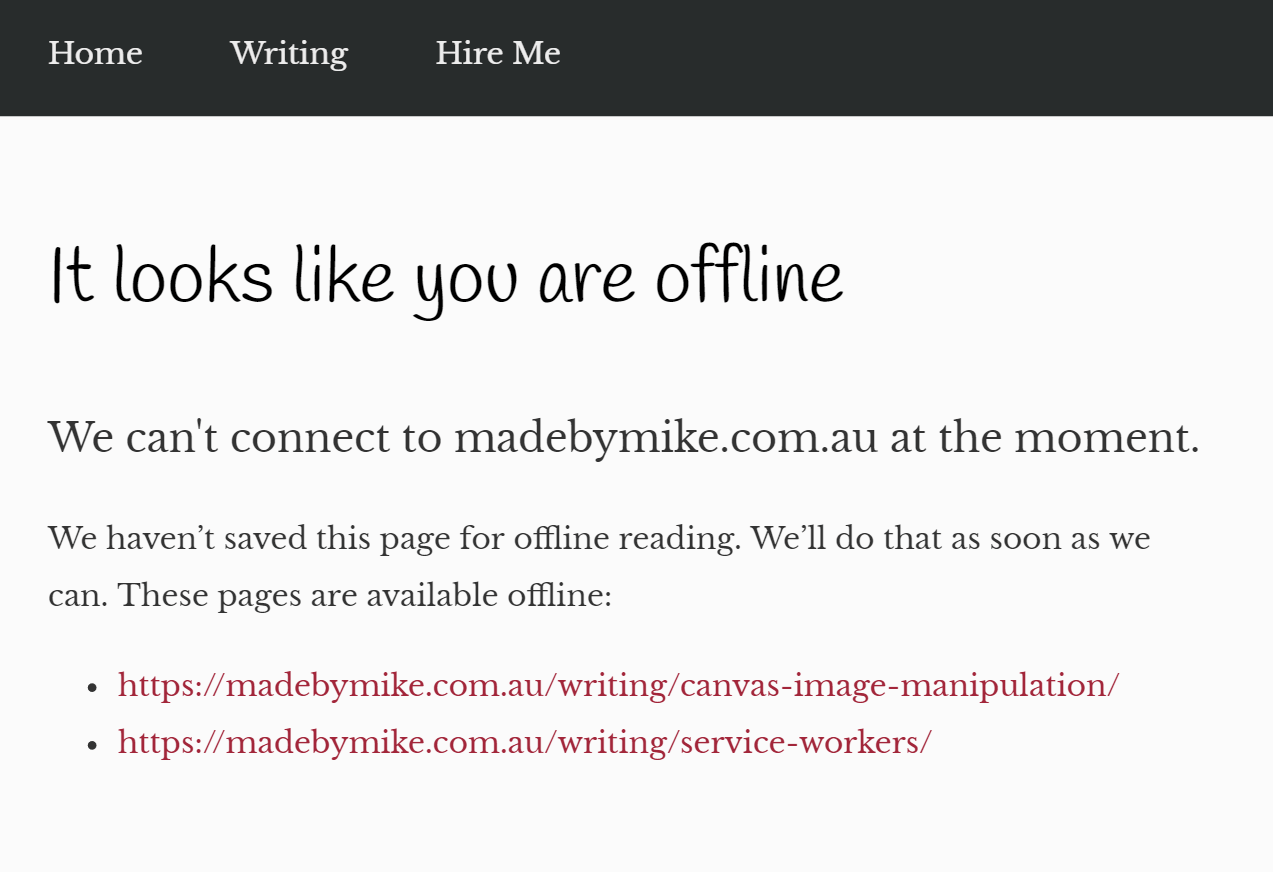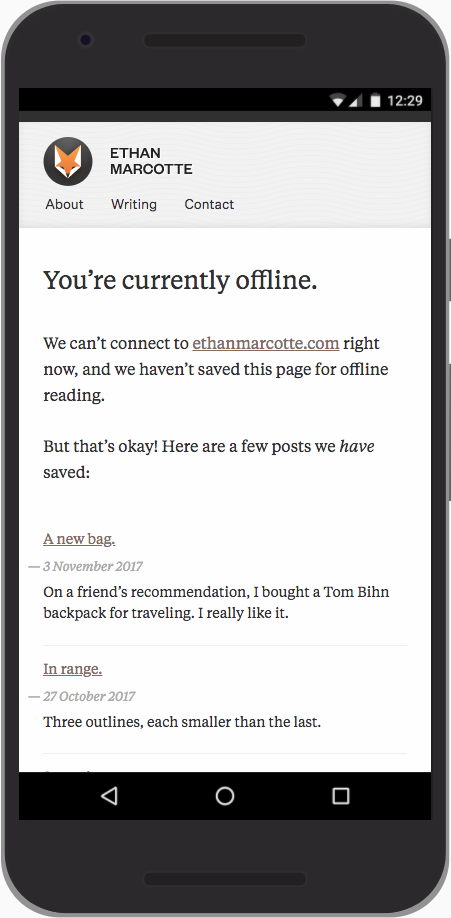
We haven’t really talked about the contents of /offline.html, the fallback page you made for the situation when all else fails. It’s entirely up to you what you put on that page—something silly or something useful. If you decide to make it useful, the Cache API can help.
So far, you’ve used the power of the Cache API from within your service worker script. But the Cache API can be accessed from other places too. You can call forth the power of the Cache API from your web pages, including your offline page.
You’ve got a cache of pages that your site’s visitor has accumulated on their journey through your site. If that visitor loses their internet connection, they may end up looking at your fallback page. Wouldn’t it be nice if you could show them a list of pages that they can visit even without an internet connection?
You can put this list together by looping through the items in your cache of pages:
This code can go inside /offline.html:
<p>You can still read these pages:</p>
<ul id="history"></ul>
<script>
// Open the cache of pages
caches.open('pages')
.then( pagesCache => {
    pagesCache.keys()
    .then(keys => {
        let markup = '';
        // Loop through each item in the cache
        keys.forEach( request => {
            // Make a link to the URL of each page
            markup += \`<li><a href="${request.url}">${request.url}</a></li>\`
            ;
        });
        // Display the list of links
        document.getElementById('history').innerHTML = markup;
    }); // end keys then
}); // end open
</script>
That’s not bad. Now visitors to your site have something to do while they’re offline (Fig 8.1).

This could be better though. For a start, we’re only displaying pages that the user has previously visited. It might be nice if the user could explicitly mark which pages they want to save for offline reading. You could provide the functionality of Instapaper or Pocket, right from your own site.
A visitor to your site needs some mechanism to save a page for offline reading. I think a button is the right element to use for this—an accessible, all-purpose trigger for handling user interaction—but a checkbox could work too:
<button class="btn--offline">save for offline</button>
You can use CSS to make the button look however you want.
You could put the button directly in the HTML of your page, but seeing as it’s only going to work for browsers that support service workers, I think it’s better to inject the button into the page using JavaScript. You can put the JavaScript inside a script element at the end of each page, or you could put it in an external file that you link to from a script element at the end of each page.
Use some feature detection so that only browsers that support service workers will get the button. Here’s the logic:
And here’s the code for that logic:
// If this browser supports service workers
if (navigator.serviceWorker) {
    // Create a button element
    const offlinebutton = document.createElement('button');
    offlinebutton.innerText = 'save for offline';
    offlinebutton.className = 'btn--offline';
    // Add the button to the page
    document.body.appendChild(offlinebutton);
}
That will add the button to the end of the page, but you might want to put it somewhere more convenient, or use CSS to position it.
Clicking that button will do absolutely nothing. Let’s change that. Inside your feature-detecting if statement, you can add an event listener to the button:
offlinebutton.addEventListener('click', function (event) {
    // Save for later
});
(I’m regressing to old-fashioned JavaScript without arrow functions. I’m a lot warier of using newer syntax outside the safe confines of a service worker script.)
The first thing to do is avoid the button-press triggering a page submission:
offlinebutton.addEventListener('click', function (event) {
    event.preventDefault();
You can also store a handy reference to the button that has just been clicked:
const offlinebutton = this;
At this point it might be a good idea to give some feedback to the user. Let them know that something is happening. You could update the text inside the button:
offlinebutton.innerText = 'saving...';
It’s time to crack open the Cache API. You can use an entirely new cache for this. Let’s call it "savedpages":
caches.open('savedpages')
Use the add method to fetch and cache the contents of the current page. You’ll need to pass in the URL of the current page, which you can get from window.location.href:
caches.open('savedpages')
.then( function (cache) {
    cache.add(window.location.href)
})
When the page has been cached, you might want to give some feedback to the user. You could update the text inside the button again:
caches.open('savedpages')
.then( function (cache) {
    cache.add(window.location.href)
    .then( function () {
        offlinebutton.innerText = 'saved for offline!';
    }); // end add then
}); // end open then
Here’s how the event-handling code looks now:
// When the button is pressed...
offlinebutton.addEventListener('click', function (event) {
    event.preventDefault();
    const offlinebutton = this;
    // Provide some feedback to the user
    offlinebutton.innerText = 'saving...';
    // Open a cache
    caches.open('savedpages')
    .then( function (cache) {
        // Add the URL of the current page to the cache
        cache.add(window.location.href)
        .then( function () {
            // Provide some feedback to the user
            offlinebutton.innerText = 'saved for offline!';
        }); // end add then
    }); // end open then
}); // end addEventListener
You have successfully cached the page at the user’s request.
The functionality of your offline page—which currently shows a list of URLs—is fine, but it could be better. Wouldn’t it be nice if it could also show the title of the page? And maybe a description too? That’s why this is a good opportunity to store metadata about the page you’re caching.
The Cache API can’t help you here. You need to reach for another API instead.
Browsers have many APIs for storing data. The IndexedDB API is quite powerful, and it’s asynchronous, which is always good. Alas, it’s also quite complex and tricky to get to grips with.
There’s a much simpler API called localStorage. It isn’t asynchronous, so you shouldn’t use it for anything too intensive, but it is pleasantly straightforward.
It has two methods: setItem and getItem. They do exactly what you’d expect them to do.
You can pass two arguments into the setItem method—a key and a value:
localStorage.setItem('name', 'Jeremy Keith');
The getItem method takes one argument—pass in a key, and it will return the corresponding value:
const myname = localStorage.getItem('name');
You can use the setItem method to store metadata when the user is saving a page to read later. Then, on your offline page, you can use the getItem method to retrieve that information.
There’s a nifty trick that allows you to store lots of data in a single localStorage value: JSON.
JSON stands for JavaScript Object Notation. Technically, JSON is JavaScript. There are no functions or loops. There are only variables, written in key/value pairs like this:
const data = {
    "key": "value",
    "other_key": "another value"
}
Those curly braces create a new JavaScript object. Each key is a property of the object (remember, a property is nothing more than a variable which happens to be scoped within an object). You can then access those values using dot notation like data.key or data.other_key.
First, create a JSON object with all the data you want to store. Then use JSON.stringify to put it all into localStorage. If you use the URL of the current page as the key, you can associate as much information as you want with it.
const data = {};
localStorage.setItem(
    window.location.href,
    JSON.stringify(data)
);
So, if you want to store the title of the current page, you could grab that from the title element like this:
const data = {
    "title": document.querySelector('title').innerText
};
Or you might want to grab the text from the first h1 element on the page. It’s up to you.
If you have a meta element with a description of the page, you could store the contents of that too:
const data = {
    "title": document.querySelector('title').innerText,
    "description": document.querySelector('meta[name="description"]').getAttribute('content')
};
You can store as much or as little information as you want. Think about what you might want to display on your offline page. For instance, if there’s a publication date somewhere on the page, you might want to store that information.
Whatever you decide, you can update your caching code to store this metadata:
caches.open('savedpages')
.then( function (cache) {
    cache.add(window.location.href)
    .then( function () {
        const data = {
            "title": document.querySelector('title').innerText,
            "description": document.querySelector('meta[name="description"]').getAttribute('content')
        };
        localStorage.setItem(
            window.location.href,
            JSON.stringify(data)
        );
        offlinebutton.innerText = 'saved for offline!';
    }); // end add then
}); // end open then
Now you’ve got a one-to-one mapping between the savedpages cache and localStorage, both of which are using URLs as keys. If there’s a URL in the savedpages cache, then there’s a corresponding chunk of metadata accessible through that URL with localStorage.getItem.
You can rewrite the JavaScript in /offline.html to take advantage of the data in localStorage. Here’s the updated logic for that:
That translates into something like this:
<p>You can still read these pages:</p>
<div id="history"></div>
<script>
let markup = '';
// Open the cache of saved pages
caches.open('savedpages')
.then( pagesCache => {
    pagesCache.keys()
    .then(keys => {
        // Loop through each item in the cache
        keys.forEach( request => {
            // Look up the corresponding metadata in local storage
            const data = JSON.parse(localStorage.getItem(request.url));
            // Make a descriptive link to the URL of each page
            if (data) {
                markup += \`<h3><a href="${request.url}">${data.title}</a></h3>\`;
                markup += \`<p>${data.description}</p>\`;
            }
        });
        // Finally, display the list of links
        document.getElementById('history').innerHTML = markup;
    }); // end keys then
}); // end open then
</script>
It’s similar to what you had before, but the metadata saved in localStorage allows you to present the user with a more readable list of pages to read (Fig 8.2). Best of all, these are all pages that the user has chosen to save offline, so you’re no longer guessing what they might want.

Now you’re providing a good offline experience—but, as with any web experience, there’s always room for improvement.
For instance, when someone saves a page for offline reading, you could cache any images used in that page. You could create a separate cache for those images like, say, savedimages. At the moment the user clicks the button to save a page, you’ll need to execute this logic:
If your site uses lots of videos or audio files, you might want to cache those too. The logic would be very similar.
There’s also room for improvement in how you present the “save for offline” button to your site’s visitors. What if someone is looking at a page that they’ve previously saved? The button still reads “save for offline.” It would be nice if you could present a different option in that situation—perhaps you don’t want to show the button at all. Or perhaps the button could say “saved for offline,” and clicking it would remove the page from the cache. You would need to add some extra steps at the point where you inject the button into the page. You could, for example, check to see if there’s an entry for the current page in localStorage.
Once you start looking at ways to improve the user experience, there’s almost no limit to what you can accomplish. There are all kinds of powerful browser APIs to investigate. APIs like Background Sync and Notifications allow service workers to execute actions even when the browser isn’t open. Data can be synced and your site’s visitors can receive notifications even when their phones are in their pockets!
That sounds a lot like what native apps can do, doesn’t it? That’s no accident. Slowly but surely, web browsers are allowing the kind of functionality that previously only native apps could provide. There’s even a name for websites that take full advantage of modern browser features. They’re called progressive web apps.
Progressive Web Apps